
$200 Basement Bathroom Makeover
- Aug 3, 2020
- 10 min read
Updated: Jan 21, 2022
Hey friends! I'm so happy to share a fun blog post with you guys today all about my recently freshened up bathroom that required no contractor and no handy man at all! I did this all on my own and it looks like I spent thousands of dollars on it, but sssshhhh I came in at just under $200 for everything I needed to give this space a jaw dropping makeover. Today's blog post is not only to show you some fun before and afters, but to explain all my tips and tricks along the way and most importantly all the sources you will need if you feel so inclined to tackle any of these DIY projects yourself!
Alright so lets get to some fun stuff, what did this room look like before?? Well it certainly wasn't the worst looking bathroom ever to go down in history, in fact there wasn't really anything wrong with it at all. Aesthetically it just didn't go with the rest of our home. We've been slowly fixing up our home these last 5 years by tackling loads and loads of do it yourself projects and for some reason this basement bathroom was the very last room to feel the touch of any paint brush by yours truly!
*This post contains affiliate links, however I don't get paid for any purchases made!

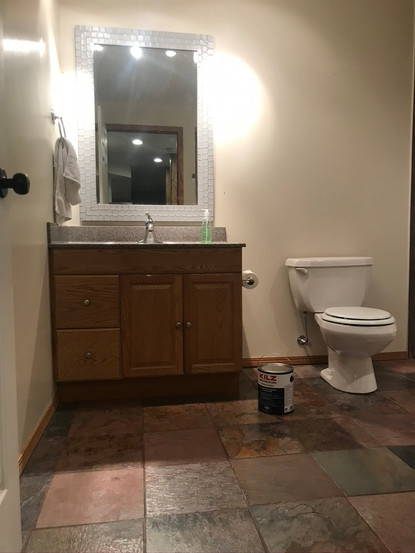
As you came into this room before you were greeted by a load and I mean a load of 12x12 slate tiles! These lovely tiles also were all over our master bathroom as well. I know a lot of you are probably thinking, "but Dale, those are so beautiful and great quality"...yes I know that, BUT it's not my taste at all, and just because something is a good product and installed well that doesn't mean I have to settle with it in my books. It always looked grimy and dirty and I never felt like this was a clean bathroom, even though it was.


Here's the basic boring vanity. Your typical oak box vanity, nothing wrong with it, but nothing too special about it either. I debated about taking it out and replacing it with a new vanity, but my goal was to spend as little on this makeover as possible, not only because I love the challenge of a low budget high impact makeover, but mainly almost all of our funds were going towards our new back yard deck we are also in the process of building, so I knew I would have to paint it out and work with what is already there.

To the right of the vanity was a toilet and then a corner shower which was the biggest eye soar of the space...well maybe after the slate!

The corner shower looked yucky and dated. I hated the white plastic surround and those horizontal privacy stripes were an extra eye soar. The inside of it was also awful. The slate and grout was never sealed, so whenever it was used the red dye would leak down and into the white plastic basin and stain it.

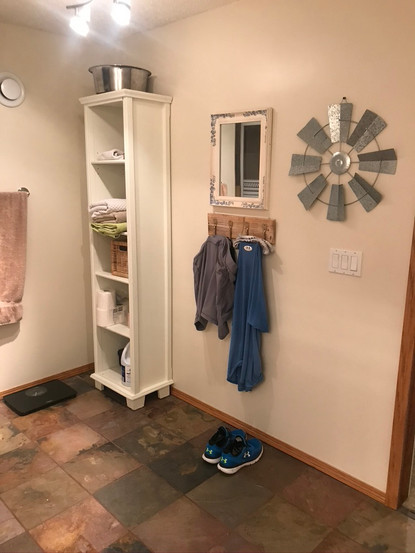
To the right of the shower was a huge space that never got used. For some reason this bathroom was built to be very large, but not properly used. This room could have easily had a lovely walk in shower and a large double sink vanity, but sadly they didn't go that route. The previous owners opted for the basics instead which again is fine, but it did bother me how empty it always felt.
So my mission ahead was to spend as little money as possible, filling up the space to be better utilized all while making it look way more modern and most importantly clean and fresh! Well, I think I achieved that you guys and I'm thrilled to show you all the after results and just how far it's come since these before photos. Not everything is done yet though however, we still need new baseboards, and trim, and I am currently looking for some more modern light fixtures, but I still need to share the afters with those of you who maybe don't follow me on Instagram. I did do this makeover back in June, but am finally getting myself to share it on the blog so everyone can see it:)
So let's begin again, and walk into the bathroom with a totally different view. Now when you come in you will see the freshly made over vanity, counter top and faucet! I also added a DIY mirror.


Have to say the pictures aren't great quality. I really struggled with taking decent looking photos down here with absolutely no natural light. So hopefully you can see the difference of these afters, pixelation and all lol!
Here's what I did with the vanity area:
painted the vanity using a faux wood technique by layering paint colours together. The colours I used are, Behr Ethiopia, Behr Peppery, Behr Pecan Sandie and Monterey Cliffs by Glidden. I would advise using a good primer on a bathroom vanity first after you have degreased them with a good cleaner, then sanded. A primer that I recommend is here. After you've done your faux wood look, you should always seal your hard work with a protective coat like this one.

You can purchase small sample pots of all of these colours at Home Depot in whatever sheen they have for about $5 a pot. That's all you will need to makeover a vanity. Click on this link so see the process I used to achieve this look from my Instagram stories.
Here are some more things I did to the vanity area to get the look...
Made my own DIY mirror frame using some scrap pieces of 1" thick dowels and painting them black and then simply clamping them on to the front of the mirror with some Gorilla glue
Spray painted the original faucet in the colour Farmhouse Black by Rustoleum. Here is a good blog post on what steps you can take to spray paint any hardware. When spraying a faucet, be sure to tape off the area and use paper or plastic as well to drape off any over spray from getting everywhere.
Next I painted the vanity counter tops with my new go to product from Rustoleum, their appliance epoxy paint . For the process on how to paint counter tops you may find this blog post useful.
I added new hardware to the vanity from Ikea. Here are the cup pulls and here are the handles.
Ok, so now moving on.... to the right side of the vanity there was a large chunk of wall that needed something to fill it with. I decided to make some chunky looking floating shelves with some leftover shiplap for the top and bottoms and 1x4's for the fronts and sides. I stained them in a mixture of 2/3 Weathered Oak by Minwax and 1/3 Special Walnut. Click here to see more on this process.


So I'm no wood worker and leave almost all the building projects up to Curtis, but this time I decided to take on the shelves myself. I didn't' want to bother Curtis while he's knee deep in our deck being built. I think these turned out pretty darn cute and do a great job of filling up the large wall better. I made these simply by purchasing 2 1x4" boards that cost $5 in total, everything else I already had....whoop!! These simply get attached to the wall by anchoring a 2x4" into the studs and then affixing the box shelves onto the 2x4. I then just simply screw down and into the top of the shelves and through the top of the 2x4, easy stuff, and trust me if I can do it so can you guys!! Don't think you need a man to do these projects ladies 💪🏼!
Moving on again to what once was a serious eye soar in this room, the dated corner shower. This was a tricky one to figure out. I originally wanted to scrape off the horizontal lines that were etched onto the glass of the shower, and have clear glass instead that I could just paint out to look like french doors. I tried a few things to remove the etching, but nothing worked, they weren't budging! I decided to leave them as is and forgo my original dream idea of the black french door look. That's ok though, I can't make all of my crazy ideas come to life. I instead put my thinking cap back on and came up with this idea.....
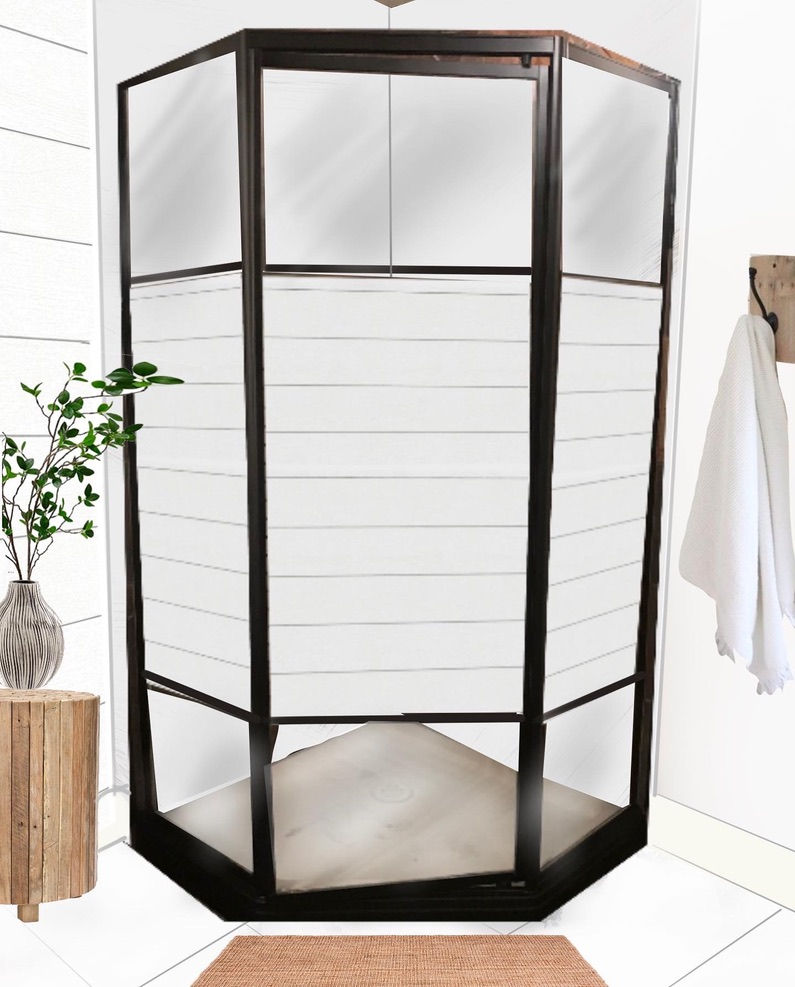
I created this sketch using an ap called Procreate for Ipad, horrible name I know lol, but great ap! I use it all the time for bringing my crazy ideas onto a screen and so I can truly visualize what it is I am thinking of.
And here is what I actually did...

Pretty darn close to my sketch hey!? I love how this shower turned out and all with paint again you guys!! You can never doubt the power of paint!
Here's what I did to bring my idea to life...
I painted the shower frame in the same Rustoleum Farmhouse Black spray paint and also clear coated a protective spray sealer over top. This one is great.
Taped off the original horizontal etching sections and primed it with KILZ primer. After the primer dried I painted it over with a good durable melamine white paint by Dulux. I then used a sharpie to get the look of shiplap over top of the white paint. Wondering what the heck sharpie shiplap is?? I promise that wasn't a typo, I said that right sharpie!! Just click here to find out how awesomely easy it is and just how real it actually looks!!
I scrubbed the heck out of the slate shower tiles. I then primed them all with the same KILZ primer as I used above with a roller brush. After I primed with 2 coats, I then applied 3 coats of the same Dulux melamine paint I used on the exterior shower doors. I don't know the name of the white paint colour is guys, sorry... this melamine paint was from the Restore. I go there often to find gallons of paint for $10. You never know what you will find there, good quality paints get donated often so take a look at your local Restore Habitat for Humanity. I sealed the tiles as well just to really make sure they weren't gonna budge. I used some Minwax Semi Gloss protective coating.
*You can always head to my Instagram highlighted stories to see more on this shower makeover
So after I finished up with the shower, I did something a bit crazy and took on the floors with a new technique I have never tried before but am SO glad I did. I marbled my floors you guys!! Yes that's right! I did a marble affect on my floors with...you guessed it, paint! What else!? Don't believe me?? Well lets take a look at the floors now.....


I have to give full credit to my talented sister in law for teaching me how to achieve this marble look with paint. She's an incredible artist and gave her own laminate counter tops the look of beautiful stone, so I knew she could help me out here.
Below are the products I used to get this look on my floors and again click here to see some "how to" videos from my Instagram.

I applied 3 coats of KILZ primer on the slate floor to cover as much of the dark reddish tiles from before. After the primer cures I rolled on one full coat of the Dulux melamine white paint that I also used on my shower tiles. I think I got my $10 worth out of this gallon, haha!
Now I am ready to marble the tiles. I worked on this tile by tile. I should also mention my tiles are 12x12" slate tiles. With my 4" roller I rolled on a thick coat of the melamine paint, then I just followed the grooves and raised ridges of the slate with a fine tip brush loaded with my sample of grey paint.
This is grey sample colour I used but really any medium toned grey paint could work.

I then took a spray bottle and spritzed the water heavily onto the grey paint followed by using a blow dryer to push the water with the paint to basically let it marbleize and do its own thing. I then sprayed some gold spray pain lightly over top of the water and paint. I know it all sounds crazy but it really works!
I let all of that fully dry over night, then I clear coated it all with the Minwax Polycrylic in the semi gloss.
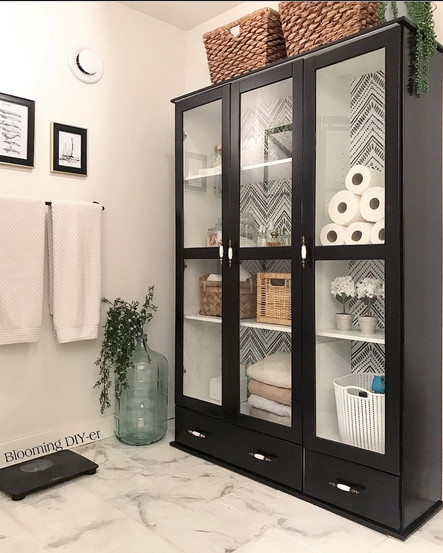
One of the last projects I tackled in this bathroom was on a piece of furniture I found on Facebook marketplace for free! I had a large empty wall in this bathroom that I could never quite decide what to do with. At one point I thought of maybe some cool old lockers, or a dresser, but as soon as I saw this piece come up I knew I had to literally "Start the CAR!" and get it before somebody else did.
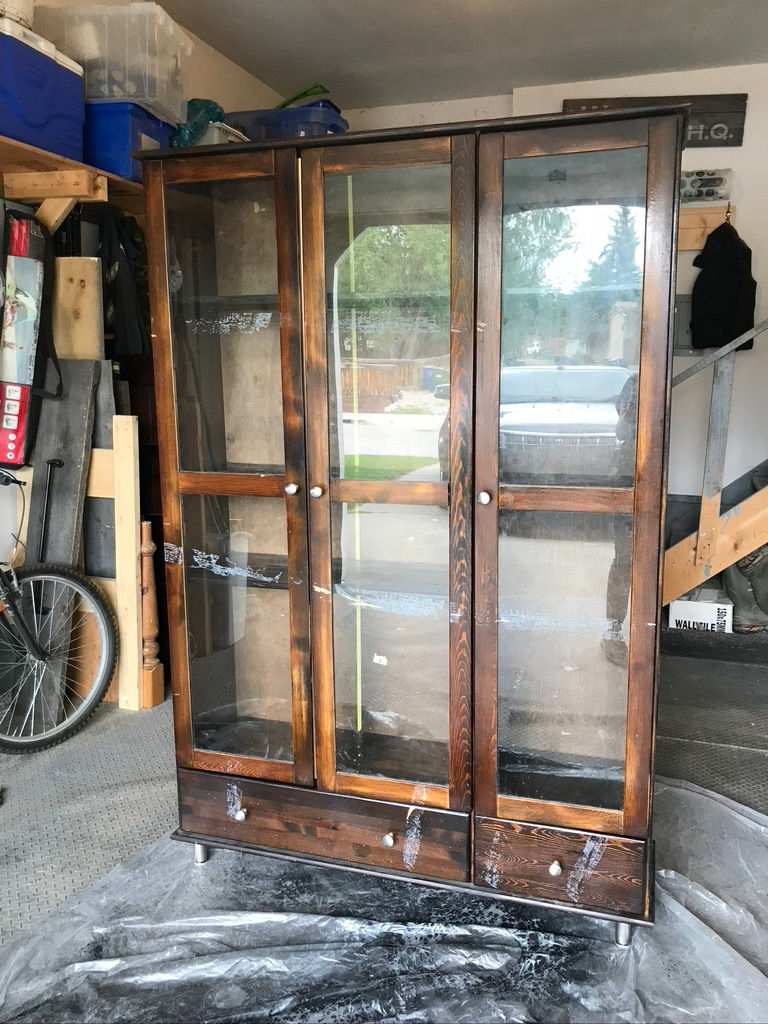
So here it is, it was in rough shape, sticker glue all over it. It smelled bad, and it was very wobbly. I am pretty certain this was a cabinet meant for a dining room to store dishes in. Instead all I saw was the pretty glass doors and clean lines, and could already envision it painted out in all black with a pretty wallpaper in the back, something to tie it into the rest of the bathroom design.

Well after some heavy duty scrubbing, sanding, priming, and painting this is what it looks like now!


Now it shines and displays toiletries, linens and cleaning supplies! I just love the stark contrast the black makes against the white walls. It fills up the space perfectly and I love that it cost me very little in supplies to give it a total makeover. If you want to learn more about how I gave this beauty it's full look, please click here. Also here is a link for the contact paper I used at the back of the cabinet. This stuff was very finicky to work with, it ripped easily so you have to handle it very carefully.
So that's the entire bathroom makeover you guys! It has sure come a long way from those beginning photos hasn't it!? Now you are probably all wondering how the heck I did this for $200 aren't you?? Well here's the break down...
$20 in paint from the Restore
$40 for good quality KILZ primer
$22 Minwax Polycrylic
$40 Contact paper for the cabinet
$5 Handles for the cabinet
$10 Gold spray paint
$18 New pulls
$5 wood for shelves
$12 Black spray paint
$20 Accessories
So we are at about $192, give or take a few cents! Like I said, I still need to fully trim all the doors and add new baseboards in here. I also need new lighting so that will still set me back a bit, but it kinds crazy how much this space has improved with so little money! Let's take a look at some side by sides now for fun! Use the slider arrows to take a good look!


Well I hope you guys enjoyed this tour of my newly refinished basement bathroom! Don't ever doubt what some paint can do and a some beginner level wood working!
Have a great day friends and happy DIY-ing!
Dale


Users can manage beneficiary information efficiently through Samagra Portal Login and access important online services conveniently.
Nice post! It reminds me of games like animedle where you try to guess characters with limited clues.
Great explanation of the EPFO Unified Portal. Users often need step-by-step clarity, and your post delivers exactly that. It’s useful for both new users and those already using the portal.
I absolutely love how creative and budget-friendly this basement bathroom makeover turned out! It’s amazing what a bit of determination and clever DIY planning can do, especially when working with a small budget. The before-and-after transformation really shows that you don’t always need expensive materials to make a space feel fresh and modern. I’ve been juggling some home projects myself lately while managing college work, and reading posts like this gives me such motivation to find balance. Honestly, DIY projects remind me a lot of tackling assignments—patience, problem-solving, and a good strategy go a long way! When I get stuck on coursework, I usually look for Java Assignment Help Online to stay organized and on track. Just like your project…
Trump threatens Sikkim game new tariffs on European allies over Greenland until deal reached, as thousands protest..