
High End Picture Frame Dupe
- Jan 13, 2022
- 4 min read
Updated: Jan 21, 2024
Happy New Year to you all!! I haven't been on the blog for a bit here and am anxious to get back into the swing of things! The break is always necessary for me and by shutting things off I feel I become a better mom, friends, wife and creator for you guys! I hope you all had a wonderful holiday season and let's just hope and pray that 2022 is on the up?? Pretty please??

The first project to start off 2022 is a DIY gallery wall I did using very inexpensive frames from Dollarama and some gorgeous prints I downloaded from an incredible Canadian Etsy account called North Prints. I came across this Etsy account while I was actually scrolling through Facebook Marketplace for some local art. It was one of those pop up ads that Facebook is so famous for....you know the ones?? The ads that literally feel like they are reading your mind. It's creepy sometimes and does slightly concern me, lol! By finding some beautiful art prints on Etsy at such an affordable, rate I was inspired to create a new feature above my other recent Facebook Marketplace find, my new cream linen sofa!

I mean isn't she a beauty?! This was such a find you guys! Here's the link for the couch. It's seriously the nicest sofa I've ever owned! I scored this beauty for $500 in pristine condition, and managed to sell my previous one for $450....so I basically like to say I paid $50 for a $2400 couch, lol! AND better yet, it was for sale in my neighbourhood!! Literally 2 minutes from my house, so obviously it was meant to be right?!
Alright so let's get back to why we are here, the gallery wall!! That blank wall above was calling for something special. I had a few ideas in mind, but once I found the Etsy art I knew I had to go in that direction. I would need some frames for the art, so I figured this would be a good opportunity to show you guys how to take some ordinary boring frames from a place like a Dollar Store and jazz them up a few notches to make them look like high end picture frames like the ones you would see at Pottery Barn or Michaels.

Here's one of my favorite inspo pics I found online of the paint colour and the wood bead details I was thinking of trying to achieve. This frame was from Olive & Birch. I just loved the colouring of the wood and that subtle white washed look. I figured this would be an easy enough look to replicate using items I already had at home and a couple things I would need to pick up.
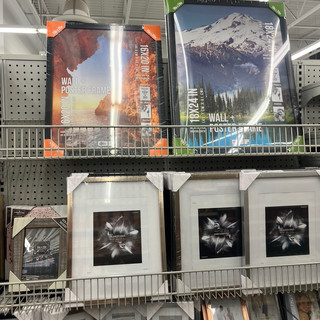
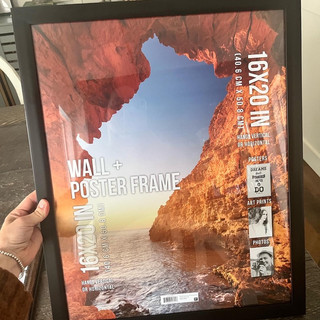
With my gallery wall I was going to need 2 x 16x20" frames, 2 x 11x14" frames and 1 x 8x10" frame. I lucked out and found all of sizes I needed at the Dollarama and only spent just under $20 for all of them! Score! If you live in Canada, check out your local Dollarama too, as they now have a larger assortment of sizes to pick from going up as large as 18x24 at some locations!


At Dollarama I also found pearl stickers that removed off in rows rather than individually, and at Walmart I found packages of wooden craft dowels. I would try to use the dowels to add a 3 dimensional detail to the flat frames I found.
I took the rows of pearls and stuck them to the edges of the frames and then just added the wooden dowels with a strip of hot glue where I thought would look best. You can do whatever you like with your pearls and dowels, there's no right or wrong way to dress up the frames.
With a nail file I softened the edges of the wooden dowels and also filled the cracks with some wood filler before I painted them out.


Once all of the beading and wood dowels were set, I painted everything out with some Linen White spray chalk paint by Rustoleum. You don't have to spray paint, you can use whatever white paint you have on hand. If you do hand paint though, I would suggest to mix a couple tbsp of baking soda into your paint to make it stick better and create more of a matte finish.
At Walmart I bought a colour called Territorial Beige by Apple craft paints. I mixed this colour with a bit of baking soda and just painted it over top of the white until I achieved enough coverage I was happy with. In some areas I took a slightly dampened paper towel and worked the brown paint in a bit to give it more of a worn in paint look rather than just brushed on. Once that was done I just dry brushed on some white paint, especially in the areas the beads were to highlight them and really make them pop!


Now at this point you could seal yours to protect your paint job. I would chose a matte finish spray top coat if I were to seal mine.
I also finished the 11x17 and 8x10 frames in the same way, just positioning the beads in other areas of the edge of the frames to give them a different look opposite the larger ones.
This turned out better than I could have hoped!! It just goes to show you can take any ordinary picture frames and make them look unique and special to your homes decor. The best part is that this cost me around $20 to complete (minus the art obviously)!

I love the shade of these frames and how they tie in so nicely with my hanging rattan pendant lights from Ikea and my variety of shaded cushions covers.


I went ahead and purchased a couple other art down loads from North Prints so that I can easily change up the art for the seasons in these frames. I love this project so much that I plan to make a few more and add a couple other prints through out our house.
Here's another one i just did for my bathroom using a frame I had kicking around....


Hope you enjoyed this post and easy DIY!
Happy crafting!
Dale


great read. i use instagram video download for motivational clips.
windows 11 keys offers practical recommendations based on different needs.