
DIY Aged Book Bundle
- Feb 17, 2019
- 3 min read
Updated: Mar 10, 2019
Do you ever see those beautiful styled bookcases or shelves where things just look so well put together? Do you ever notice one common item(s) that is usually there? Yes, it’s books, beautiful books! Some books are modern, with their sleek lines and shiny accents, some are multi coloured and a collection of a favorite author, and some are the classic vintage books that look so well styled...they just add that extra look of character and style to the space. It’s the look of old books that have my heart. Every time I see old books I get all warm and fuzzy inside. I love the look of their worn covers, dark edges, and even their smell! I’ve been slowly collecting old books over time, but now I find my local thrift store is charging far too much for the old ones. The best place to find old books for next to nothing are good ol’ garage sales, so keep an eye out guys!
So let’s get to what we are actually here for today, a fun DIY involving books! With just a few simple steps, today I’m going to show you a way to get the look of a vintage stack of books with some supplies from the Dollar Store, and a few other useful items you probably already have kicking around your house.
What you will need:
Any books you have and don’t mind using for decorating. Try to avoid anything with a coil spine
1 Black tea bag
Brown wrapping paper or craft paper, I got mine at Dollarama
Twine or ribbon in your colour of choice
Matte Modge Podge, you can get it at Walmart, Michaels or Dollarama
Tape
A printer if you want to print off labels
Step 1:
Take your book and simply wrap some craft paper around it. I just simply taped my brown paper to the inside of the front and back covers. I also made sure to wrap it around the top and bottom of the book front and back covers as well so the craft paper looks like its fully wrapped around the covers.

Step 2:
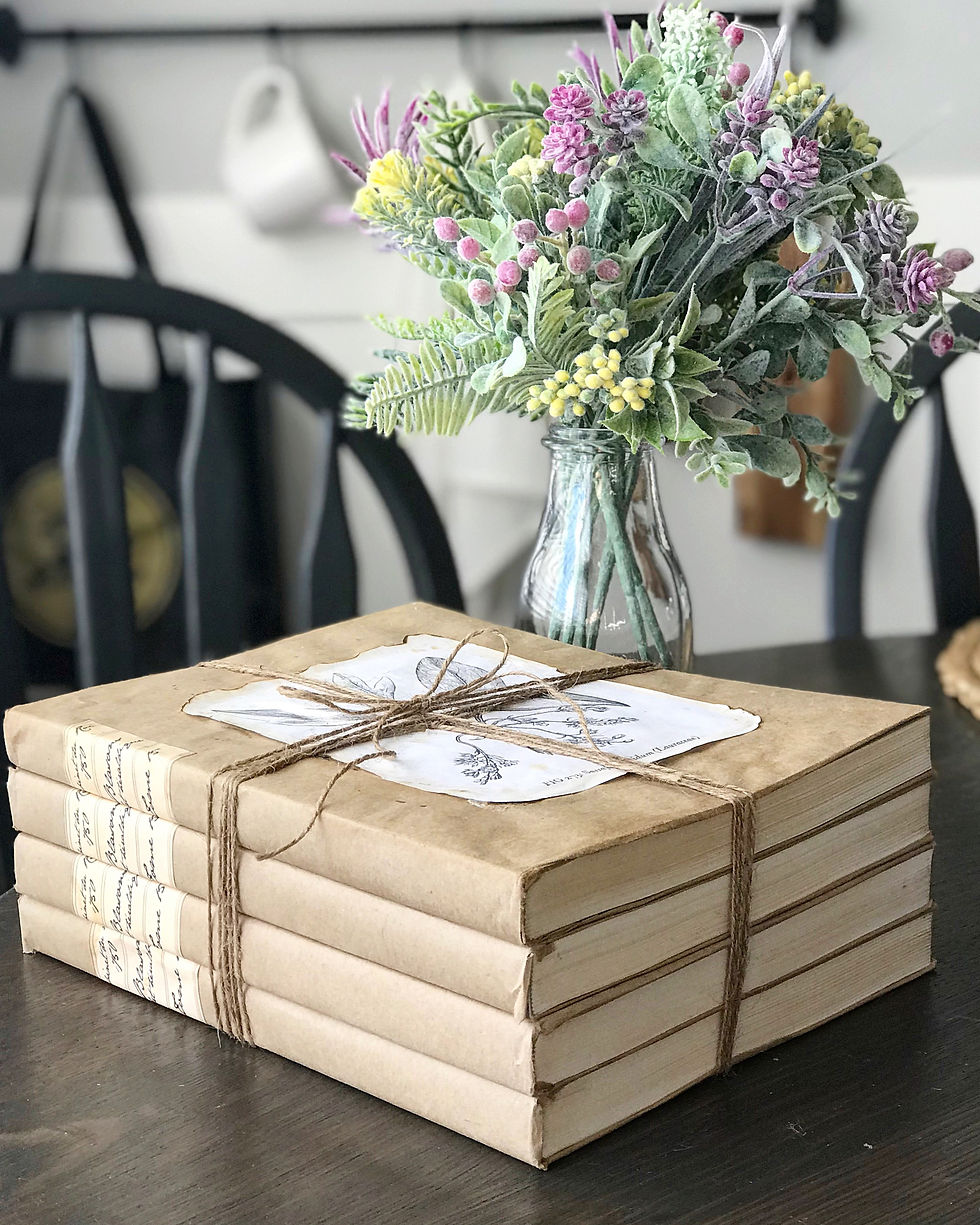
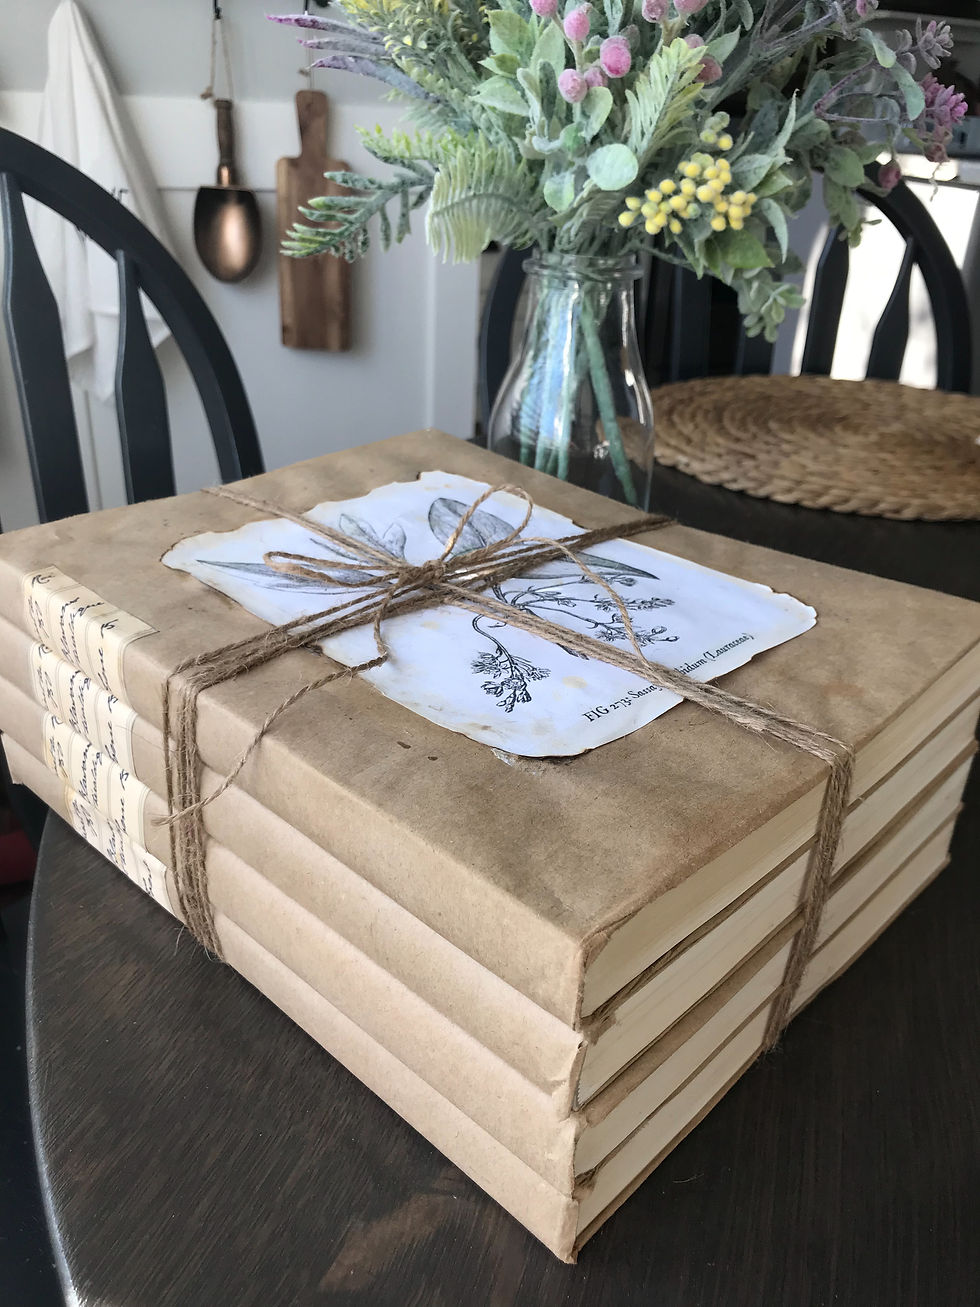
This first book I wrapped I made my cover book for the bundle, so I wanted to add a little something special to the front of the book. I went on Pinterest and found a beautiful set of botanical images here and printed one off. After I cut it down to fit the book, I took a lighter and carefully singed the edges of this image over top of the sink to give it an old beat up look. Then I modge podged the back of the image and stuck it to the middle of the top of the book.
Step 3:
I added some pretty spine labels that I printed off from here. Debbie has written a great blog post there on how she also made a beautiful aged book bundle, so be sure to check out her blog post as well for great ideas!
Step 4:
I boiled my kettle and steeped a tea bag in very little water, just to get the tea bag activated. After its cooled down, I grabbed the tea bag and squeezed out any excess water and rubbed the tea bag along the paper edges of the books. This will add that brown tone to the pages so it looks old and not so white and new anymore. I also rubbed the tea bag around the white surface of the botanical image to also give it a stained and not so new look.

Step 5:
Now you can repeat step 1 for the rest of your books and step 3 if you would like to add a label to all the spines.
Step 6:
After I finished covering all my books, I took my twine and wrapped the entire stack of books on top of each other a few times to give it a lot of texture. You could tuck a sprig of greenery into the top of your knotted twine, or add a cute tag even to give it a bit of extra charm.
I hope you’ve enjoyed this very easy tutorial of my vintage book stack! This will add a lot of character to your bookcase or shelves or even a coffee table. I plan on making many more stacks to use up some old ugly books I have hidden away, and have them all through out my built ins. I’m addicted now, haha!
Enjoy your day friends and let me know what you think of this DIY in the comments sections below!
Love,
Dale xo


this is a clever way to give old books a new life as decor. the tea staining technique for aging the pages is a simple but effective touch. i appreciate the specific mention of using matte modge podge and where to find the materials, it makes the project feel very approachable. the finished bundle looks like it would add a nice, cozy texture to a shelf. AI Image Editor
Lovely tutorial. Side note for the Blooming DIYer site: with DIY Projects, Decor, Before & After, and Client Reveals + decade of posts + the design/staging service at bloomingrooms.ca, the site is doing real work — but readers searching for "vintage shelf styling" or "thrift flip" face a category-only nav that hides serendipity. A sortable "Find a Project" landing page (filter by skill level + budget + room + finished look) would dramatically improve repeat visits. I help small DIY/lifestyle creators ship that with a copy web ai — Figma to working filter page in an evening. Worth a chat ahead of the next Pinterest traffic spike.
The black-tea-bag along the page edges is the trick that separates a "wrapped book" from an actual vintage-looking stack — bookmarking this. I run a small home-styling account on IG and use an NanoBanana AI image and editing tool to mock up styled shelf compositions for clients (before they commit to a real wood stain, sourcing the botanicals, etc.). Saves a ton of back-and-forth on whether the brown tone will read right next to existing decor. Dale's Dollarama hacks are some of the best I've found in Canadian DIY content.
Fantastic DIY tutorial with practical tips for painting stair spindles more efficiently. The step-by-step approach made the project feel achievable and less overwhelming for homeowners. we Pet Transport to London appreciate creative home improvement content that inspires people to enhance their spaces while building confidence in their own DIY abilities.
This stair spindle painting tutorial was extremely practical and motivating for DIY enthusiasts. The instructions make the process https://bgenerous.com/ feel achievable while saving time and effort. appreciates home improvement content that encourages creativity, confidence, and personal satisfaction through simple yet effective renovation and decorating techniques. Excellent tips and presentation overall.