
How I Gave a $100 Cabinet a Restoration Hardware Look
- Dale Wedge

- Jan 23, 2020
- 8 min read
Updated: Jan 21, 2022

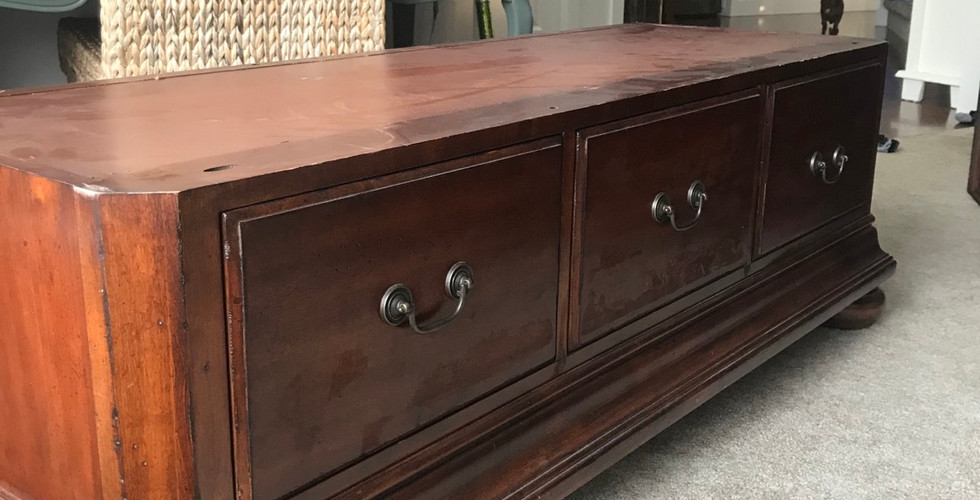
I am super smitten guys! I found the most incredible second hand french door cabinet for only $100!! I happen to come across the ad for it on Kijiji. I could sort of make out the grainy dark photos of what looked like beautiful french doors and a separate 3 drawer base. The ad was horrible, the pictures were dark and the hutch was in 2 pieces with the doors off. I looked at the posted date of the ad and it was back in August of 2019! Here we are January of 2020....so I thought there must be something wrong with it?? So we decided to go and take a look at it anyways.......I mean for a $100 why not go and see it in person right?
We packed the kids up in the truck and made the half hour drive in -30 degree weather! When we got to the storage unit the seller tells me he originally had it listed for $400 and no one was interested, so he lowered it to $200 then down again to $100!! Lucky me I thought! I literally took one look at it, threw $100 at the seller, tied that bad boy down with frozen hands, then sped off like serious bandits.....a definite "START the CAR!" moment! So here we are today you guys....here we are with how I gave this glass door cabinet an easy rustic RH/Pottery Barn paint finish in only 2 1/2 days!!

Here's how I did it...
Supplies Needed:
So there are 2 routes you can take before I get started on the supplies you need. One is to make your own chalk paint out of latex paint. I always try to use less expensive paints when I make my own. There is the odd brand that does not like Plaster of Paris. I know one for certain is Valspar, so avoid that one. I usually go with Behr paint when I make mine, which has always worked out great for me. Here is my go to recipe:


Or you can use ready made chalk paint, like this brand. The colours I am going to recommend to you today are colours by Behr, so from what I have heard you can get them to mix their ready made chalk paint with these shades as well.
1 Quart of flat sheen Behr Ethiopia,
(Optional) 1 Quart of flat sheen Behr Peppery, if you would like to do a two tone look like I have on the cabinet doors
Drop cloth
Chalk paint brush or good latex brush
A good quality sealer brush like this one
Top Coat, such as Minwax Polycrylic or Rustoleum Matte Clear Coat
Foam brushes
Paper plates
Lint free rags
Degreaser like TSP, or you can use some good ol' blue Dawn
Scrubbing sponge
Sanding blocks or paper, medium and fine grit

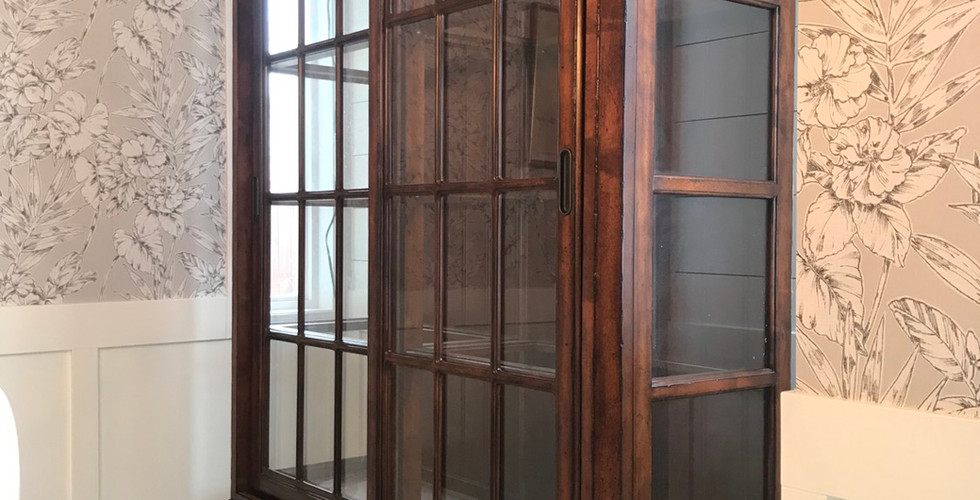
Alright so lets take a look at what I was starting with. As you can see in the below slideshow this was a stunner! I know what some of you may be thinking already....but Dale it's so beautiful as is, I can't believe you want to paint that!! Yes I agree with you, it is beautiful as is, but I always try to encourage people to not let a piece in it's original state always pressure you to leave it as is. Of course in certain cases, like a family heirloom or a heritage piece it might be hard to change or paint the furniture, but in this case where I just didn't care for the original cherry wood colouring and all those red undertones, and the fact that it had no history to me or my family, I just knew I had to make it fit with my style and home! Why look at a piece of furniture in your home everyday if you just don't like the colour of i?? When it's so easy to simply paint it and make it a one of a kind beauty to suit your home more to your liking!


Step 1:
First thing you must do is prep prep prep your piece! Lay your drop cloth out and have your piece taken apart as best you can. Take the cabinet doors off and pull the drawers out. I can't stress enough the importance of this next step and how to properly prep a piece of furniture. Nothing upsets me more then when I hear someone spent time an money on painting a chair or a table only to have it chip within weeks! Usually it's because they didn't spend the extra time to sand or they didn't wash the piece off first. If you skip these steps, your piece will more than likely chip.
Sand. Get your fine-medium grit sanding sponge out and give it a light going over in the direction of the wood grain. I would use the medium grit if the piece requires more smoothing out, say if it's been roughed up a bit more over the years and you can see obvious dents and scratches. If the piece looks to be a good shape, then just give it a going over with the fine side of the sponge and give it a good buffing, just enough to etch the shine up a bit. Usually with chalk paint you don't need to sand, so why am I asking you to do this?? Well because it only takes a few minutes to give a light sanding and why not spend that time insuring you've got an extra step in there to prevent it from chipping even further. After you've sanded it mix up your TSP or get out a hot bucket of Dawn dish soapy water out and scrub that piece down so it squeaky clean and no leftover grease and grime is on there! Even if you think your furniture is clean you will be surprised what come off of it especially if you use some TSP.

Dry your piece down fully with a dry rag and get ready for the next step.
Step 2:
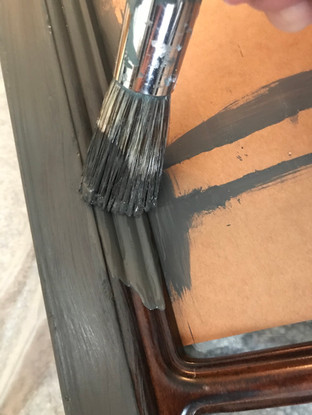
Stir your chalk paint with a stir stick, don't shake the can. Pour your chalk paint onto a paper plate. I like to use a paper plate because I find it easier than dipping in and out of the can constantly. Apply your first coat of chalk paint in the colour Ethiopia by Behr in the direction of the wood grain. I personally like to use a chalk paint brush, but you absolutely can use a good natural bristle brush like a Purdy's brush as well. Your first coat doesn't have to be perfect, just get that coat on and wait for it to dry. I usually only wait 1 hour for the first coat to dry before I get my second coat on. Chalk paint takes no time at all to dry.

Step 3:
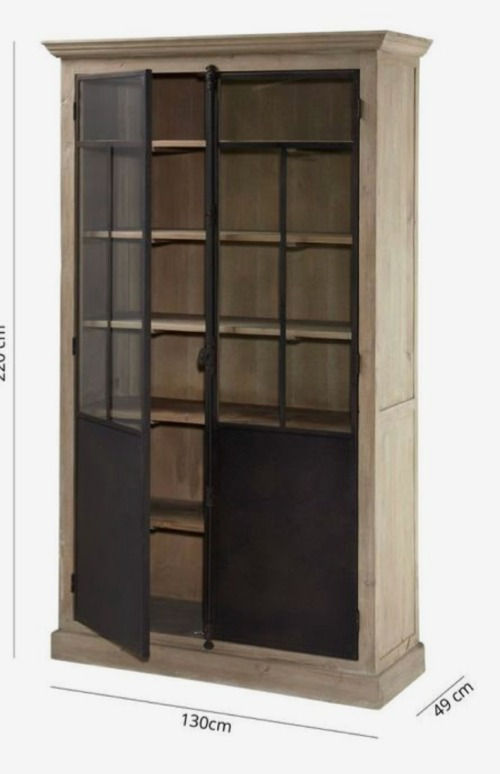
After your second coat of chalk paint is on and at least sat to dry for 2 hours it's now time to glaze your piece to get that rustic aged tone that you so often see in Pottery Barn or Restoration Hardware. Here is that gorgeous look I am talking about in these inspo pics below I found from Pinterest.


You can apply the glaze with a rag or a foam brush. I like to use a foam brush to paint it on and then wipe it off afterwards with my lint free rag, always going with the grain of the wood.


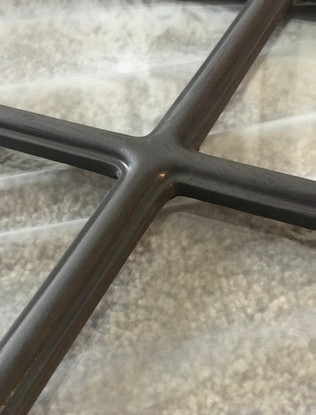
What I love about glaze is how easy it is to work with. It's very watery however, so just be careful you don't drip too much by over loading your brush. You can get a similar affect using dark wax, but I am not a fan of waxing much at all. I find with waxing it's a real skill. Everyone says it's so easy, but I can't quite figure it out! I usually have too much wax or not enough, and then if I'm using dark wax to get this same look I always make it look too blotchy and find I can't control where it goes nearly as easy as I do with glaze. Glaze is as easy as wiping it on, and wiping it off. Below you can see how the glaze looks after it's wiped off and how nicely it settles into the crevices and grooves and leaves a subtle vintage hue behind.


Now if your furniture has round legs or your piece isn't as flat as these drawers are, just switch your brush out to an inexpensive paint brush or chip brush. You can get chip brushes at dollar stores, craft stores of hardware stores. Apply your glaze with the plaint brush the same way as before going with the grain of the wood, then wipe off. After you've wiped it off with your rag, another thing you can do to create a bit more character and dimension is to use your same rag to blot more glaze back onto the piece in areas that would naturally get sort of dirty (in a pretty way haha). I also took my chip brush and dry bushed some glaze onto some high point to add some more dark flecks behind. See below how gorgeous it's looking once that a glaze settles in to those grooves....I was starting to drool at this point you guys. You really can't mess glazing up, the more you "play" with it, the more character you are just adding to it, trust me!


Glazing the crown molding on the top of my cabinet was super easy and fun too! Again as easy as wiping on and wiping off.


Step 4 (Optional):
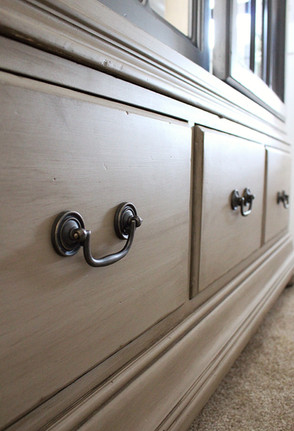
This is an optional step if you would like to add a two tone look. I wanted my french doors of my cabinet to really pop and stand out as that was the main feature I fell in love with when I first saw this cabinet, so I figured I would want to high light those in a modern farmhouse way. Using the colour Peppery I made my own chalk paint and painted it on the french doors. I usually hate painting french doors with every ounce of me!! In this case I got super lucky and was able to tuck a thin piece of cardboard like paper behind the wood slats so I could paint with ease. This was SO much easier than taping off all the slats. I painted 2 coats of Peppery to cover these doors.


Step 5:
Once your paint and glaze has dried over night it's now time to seal your piece! I used Rustoleum's Matte clear coat on my entire piece including the inside of the cabinet. I wanted full protection and a smooth velvety finish every where. Chalk paint is so dry and sometimes feels gritty once set, so I always like to give my piece a very light sanding first with a fine grit sanding sponge. Give your can a good stir first, do NOT shake! Apply your sealer in the direction of the wood grain using a nice silky bristle paint brush. You can use any good quality paint brush really to apply sealer, but I found by specially using a top coat brush it made my finish more smooth and less bristley looking if that makes sense? When you apply your poly or clear coat make sure you don't over load your brush and try not to over work the sealer too much. It's tempting to want to really get all of those bubbles out but the more you go back and forth the more streaky it's going to appear, just let those bubbles settle on their own, it's very normal.


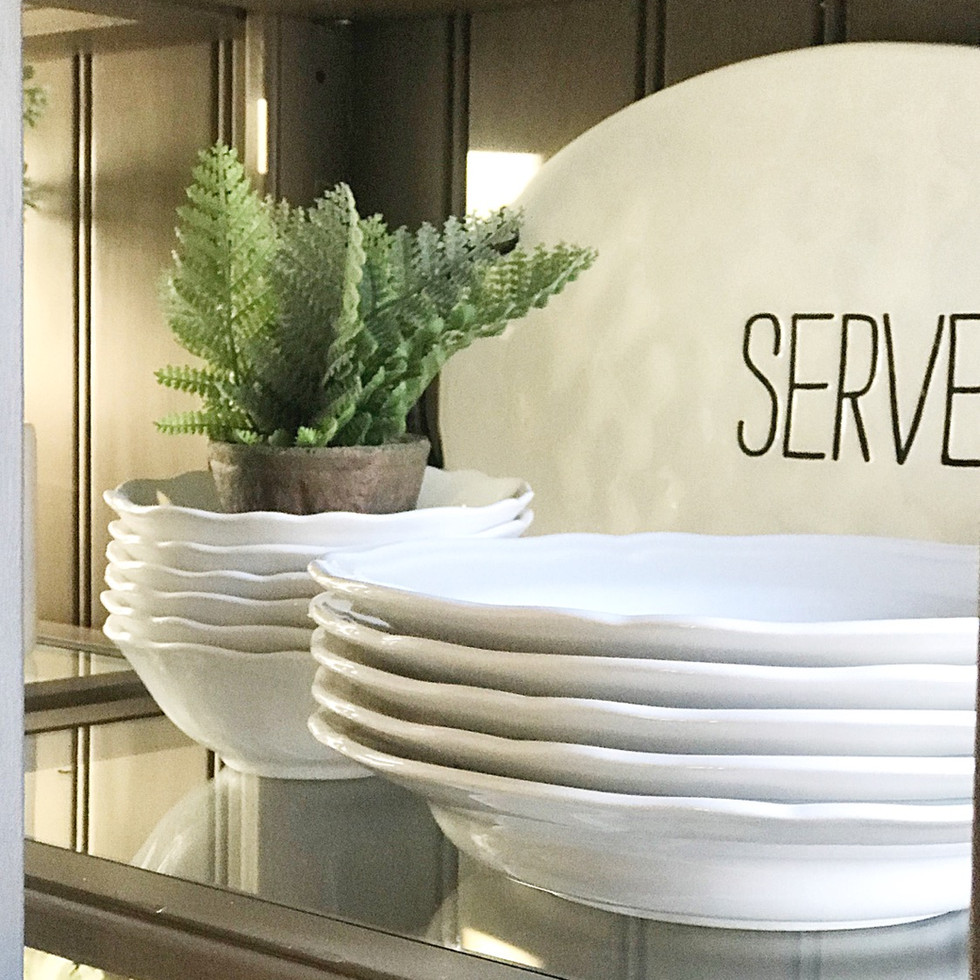
Apply 2 coats of sealer with proper dry time as indicated on the can in between coats. Once fully cured it's time to show that bad boy off!! I was so pumped to load my cabinet full of my dishes that I've had in storage and packed away since we got them at our wedding in 2007!! I had all of these beautiful white bone Denby china serving dishes hidden away for so long, but not anymore! Now they are on full display in my beautifully painted hutch that now sits in my little dining room nook!
Get ready for a picture over load.....


I hope you guys have enjoyed this tutorial on how to get an easy Restoration Hardware finish in a few easy steps! Don't be afraid to give it a try. You might actually find painting fun and addicting like me, but I'm just a big home decor nerd so it's to be expected lol! Nothing stands a chance in my home to be in it's original colour for very long.
Enjoy your day guys and be sure to leave me a comment or question below if you wanna chat about this blog post. I love hearing from you guys!
Dale


When considering online trading platforms, it's crucial to assess their legitimacy before investing any money. One such platform that often comes up in discussions is OctaFX, and many users in Malaysia have raised questions about its trustworthiness. If you're wondering whether OctaFX is a scam, it's important to look at the available reviews and experiences shared by users. Some claim to have had positive experiences, while others have reported issues, raising suspicions. Before jumping to any conclusions, it's wise to read detailed articles and reviews from credible sources to get a clearer picture of how the broker operates. For instance, an article on Murai highlights both the pros and cons of using OctaFX penipu in Malaysia.
Click here provide members with discounts on over-the-counter medications, vitamins, and health essentials, promoting better health management and cost-effective wellness solutions. kaiserotcbenefits.com - more details here
Click here help you find recent death notices, providing information about funeral services, memorials, and tributes for loved ones in your area. obituariesnearme.com - more details here
Click here? Many users have had mixed experiences with the platform, so it's important to read reviews and verify deals before booking. istravelurolegit.com - more details here
AV在线看 AV在线看;
自拍流出 自拍流出;
国产视频 国产视频;
日本无码 日本无码;
动漫肉番 动漫肉番;
吃瓜专区 吃瓜专区;
SM调教 SM调教;
ASMR ASMR;
国产探花 国产探花;
强奸乱伦 强奸乱伦;
AV在线看 AV在线看;
自拍流出 自拍流出;
国产视频 国产视频;
日本无码 日本无码;
动漫肉番 动漫肉番;
吃瓜专区 吃瓜专区;
SM调教 SM调教;
ASMR ASMR;
国产探花 国产探花;
强奸乱伦 强奸乱伦;
代发外链 提权重点击找我;
蜘蛛池 蜘蛛池;
谷歌马甲包/ 谷歌马甲包;
谷歌霸屏 谷歌霸屏;
谷歌霸屏 谷歌霸屏
蜘蛛池 蜘蛛池
谷歌快排 谷歌快排
Google外链 Google外链
谷歌留痕 谷歌留痕
Gái Gọi…
Gái Gọi…
Dịch Vụ…
谷歌霸屏 谷歌霸屏
负面删除 负面删除
币圈推广 币圈推广
Google权重提升 Google权重提升
Google外链 Google外链
google留痕 google留痕