
Ikea Rast Hack
- Dale Wedge

- Feb 17, 2019
- 4 min read
Updated: Jan 21, 2024
Today I'm going to share with you guys a low budget DIY Ikea hack! Who doesn't love a good Ikea hack right?? You guys know my love for Ikea and how much we love to add on to their affordable pieces. We needed decent size night stands badly. I had bought these little Ikea Rast dressers with the goal in mind to beef them up and turn them into beautiful nightstands to go with our king bed. We needed larger scale night tables to not only make things feel more proportioned in here and more like a grown up's bed room, but also to have more storage for clothes and books.


I bought these little pine dressers when Ikea had their bedroom event on so I saved an additional 15% off on top of their already low price of $39.99. For about a year all we did was add new knobs from Home Sense and they looked like this for a while.....

Nothing very spectacular, but I was just happy to just have some storage and a place to rest some lamps. So finally after a year of looking at them like this, we brought them into the garage and started to work on them.
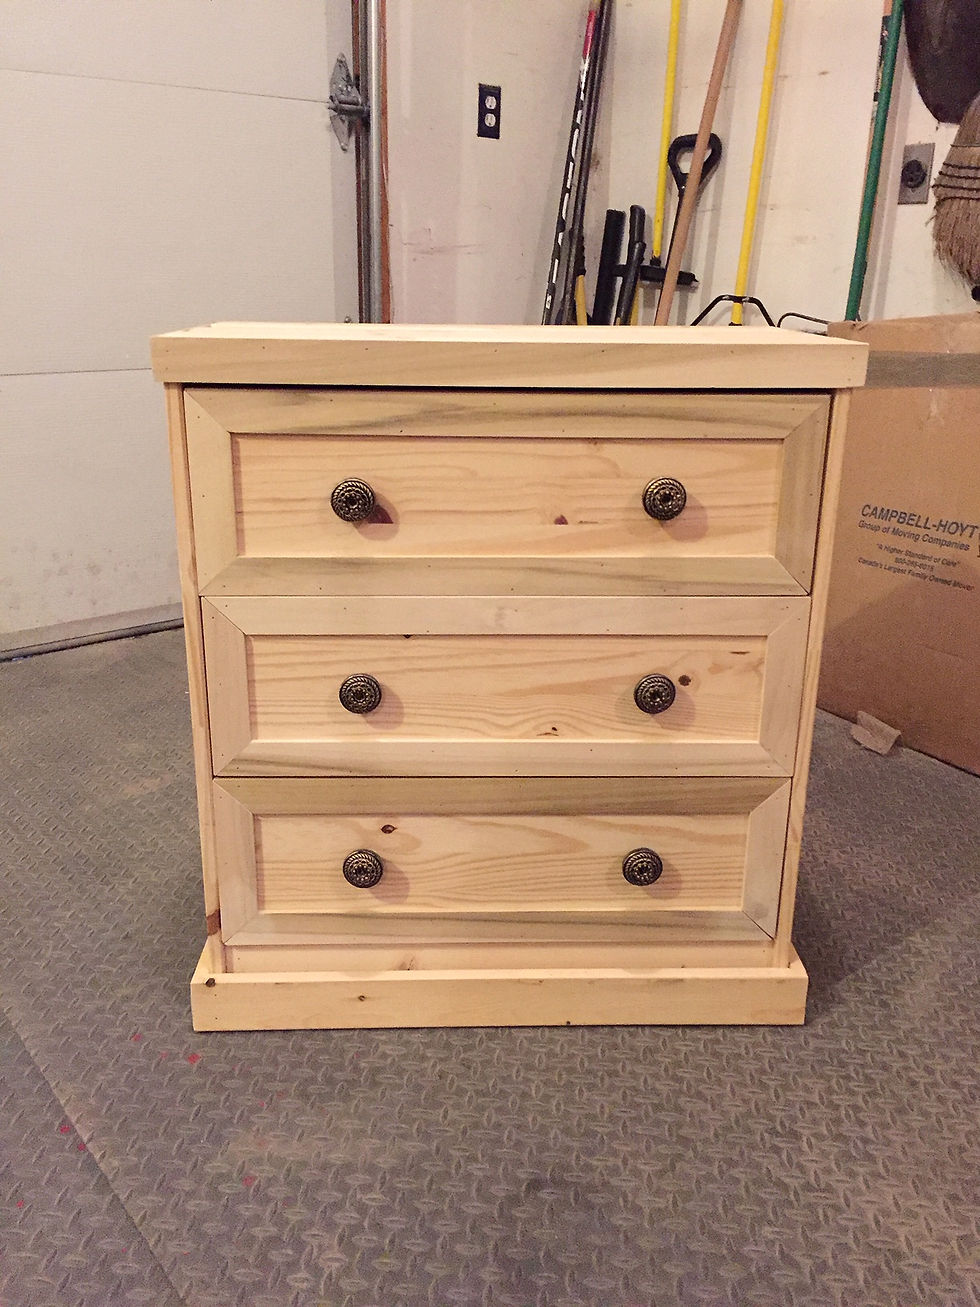
You can see how much more substantial it looks now just by using some simple tools and inexpensive materials to make them look more substantial. So here is what we did; first, we trimmed out the fronts of the drawer using lattice strips. Lattice is great to use, because it's very inexpensive and light weight. We decided to miter the corners of the drawer fronts, but you don’t necessarily have to. We used small finishing nails to attach them to the existing drawer fronts, you could also use Gorilla wood glue to attach them. Then we framed out the bottom of the dresser using 1×3" pine boards. There is a small gap in the front of the bottom trim piece, but we didn’t mind it. You could add a piece of wood in there to fill it in if it bothers you.
Then for the top of the dresser we nailed down 1-1×6 in the center and 2-1×4’s on each side of the 1×6 straight down and into the existing dresser top. We framed out the top boards with more lattice around the edges and mitered the corners together. After all the mew trim work was done I filled in all the nail holes and angled corners with wood filler. After it dried I sanded it all down lightly and started to paint and stain.


Using my favorite stain combo of 1/2 Minwax Classic Grey and 1/2 Minwax Jacobean mixed together, I wiped that on and let it dry for 10 minutes and then wiped off any access. I found the new pine boards we added didn’t stain as dark and evenly as the Ikea pine so I had to do some second coats and touch up jobs to create a more even look. After the stain dried overnight I did a very light whitewash over the top of all the stained boards just to tone down the colour a tad, as I found it too dark. I whitewash using a mixture of 1 part white paint to 3/4 parts water and simply paint it on using an old paint brush then wiping off the excess using a wet paper towel.
I then applied two coats of Minwax Polycrylic in Clear Satin to all of the stained areas. The rest of the dresser got painted out in my go-to paint I use in my entire house, CIL door and trim paint in semi-gloss, which I buy at Home Depot in the gallons. I get it tinted in Simply White by Benjamin Moore. I know there are better paint products out there to paint furniture with, but I have used this product many times on furniture and it works great and never chips and not to mention its so much cheaper than furniture paint.
Finally, we added new knobs to all of the existing holes. I always find beautiful and unique knobs at Home Sense here in Canada, if you are in the US try Home Goods! You can find them in multi packs too and for under $20!
Here are a few pics of the dresser in our room now that they are all done! I will say the drawers don't open as smoothly as you would want them to. They are not on smooth gliders, just wood gliding on wood, so they tend to not always close the easiest, but I'm used to it now, and it doesn't bother me. I actually plan to give these to our daughter some day soon and then we will get some even larger night stands for in here.


Hope you enjoyed this little Ikea Rast hack dresser makeover project as much as we did and feel inspired to pretty up your bedroom as well!
Thanks for stopping by friends!
Love,
Dale xo


Mình thường xem game trực tuyến online là lựa chọn giải trí phù hợp với nhịp sống bận rộn. Khi trải nghiệm nhiều nền tảng, mình nhận ra những nơi có nhiều trò chơi sẽ giúp người chơi linh hoạt hơn. Có thời điểm mình muốn đổi không khí nên mình hay lướt nohu code để thử thêm trải nghiệm khác. Việc sắp xếp trò chơi rõ ràng giúp mình chọn nhanh mà không bị rối. Ngoài ra, độ ổn định của hệ thống cũng khiến trải nghiệm thoải mái hơn. Khi tìm hiểu thêm, mình có tham khảo nohu900net để có cái nhìn tổng quan.
Mình có lần lướt đọc mấy trao đổi trên mạng thì thấy nhắc tới hb88 trong lúc câu chuyện đang nói dở, nên cũng tò mò mở ra xem thử cho biết. Mình không tìm hiểu sâu, chỉ xem qua trong thời gian ngắn để quan sát bố cục và cách sắp xếp các mục nội dung tổng thể. Cảm giác là trình bày khá gọn, các phần rõ ràng nên đọc lướt cũng không bị rối, với mình như vậy là đủ để nắm thông tin cơ bản rồi.
Mình thường xem các bài giới thiệu game online theo kiểu tham khảo nên để ý xem nội dung có dễ hiểu không. Đoạn nói về Rút Tiền Luck8 được viết khá rõ, không quá dài nên đọc nhanh vẫn nắm được ý chính. Bài cũng nhắc đến các nhóm trò chơi phổ biến như slot, game bài, bắn cá nên phù hợp với người mới muốn trải nghiệm nhẹ nhàng. Trong bài có nhắc luck8name như thông tin liên quan, chèn rải rác nên khá tự nhiên.
Hôm trước mình có đọc được một vài bình luận về nổ hũ dn88 và cảm thấy khá thú vị, nên ghé vào xem thử. Mặc dù không tìm hiểu kỹ lắm, nhưng mình đã lướt qua một vài phần trên trang và thấy cách trình bày cũng ổn. Các mục phân chia rõ ràng, dễ nhìn, nên mình có thể nắm được thông tin một cách nhanh chóng. Với mình, như vậy là đã đủ để có cái nhìn tổng quát rồi.
Mình có lần lướt đọc mấy trao đổi trên mạng thì thấy nhắc tới Go 88, nên cũng tò mò mở ra xem thử cho biết. Mình không tìm hiểu sâu, chỉ xem qua trong thời gian ngắn để nhìn bố cục và cách sắp xếp nội dung tổng thể. Cảm giác là trình bày khá gọn, các mục rõ ràng nên đọc lướt cũng không bị rối, với mình như vậy là đủ để nắm thông tin cơ bản rồi.